Documentation
Getting started with Caventi
This page takes you from sign-in to your first product: what the dashboard shows, how the app is laid out, what your role unlocks and how to model your organisation. From there it branches into the five topic pages for daily work.
Caventi is multi-tenant: you always work in the context of one company, and everything you see belongs to that company. Who sees and may change which areas follows from the role and the position in the organisation. This page explains both and points to where to read on.
Sign in
Sign-in works through a magic link. On the "Anmelden" page you enter your e-mail address and click "Anmeldelink senden"; you open the link from the e-mail to enter the application. If you belong to more than one company, a company selection follows. There is no password.
No account yet? The "Firma kostenlos testen" link below the form leads to self-registration: you create a company and become its first administrator. The left panel carries the Caventi brand and the tagline about managing hazardous products safely.
The dashboard
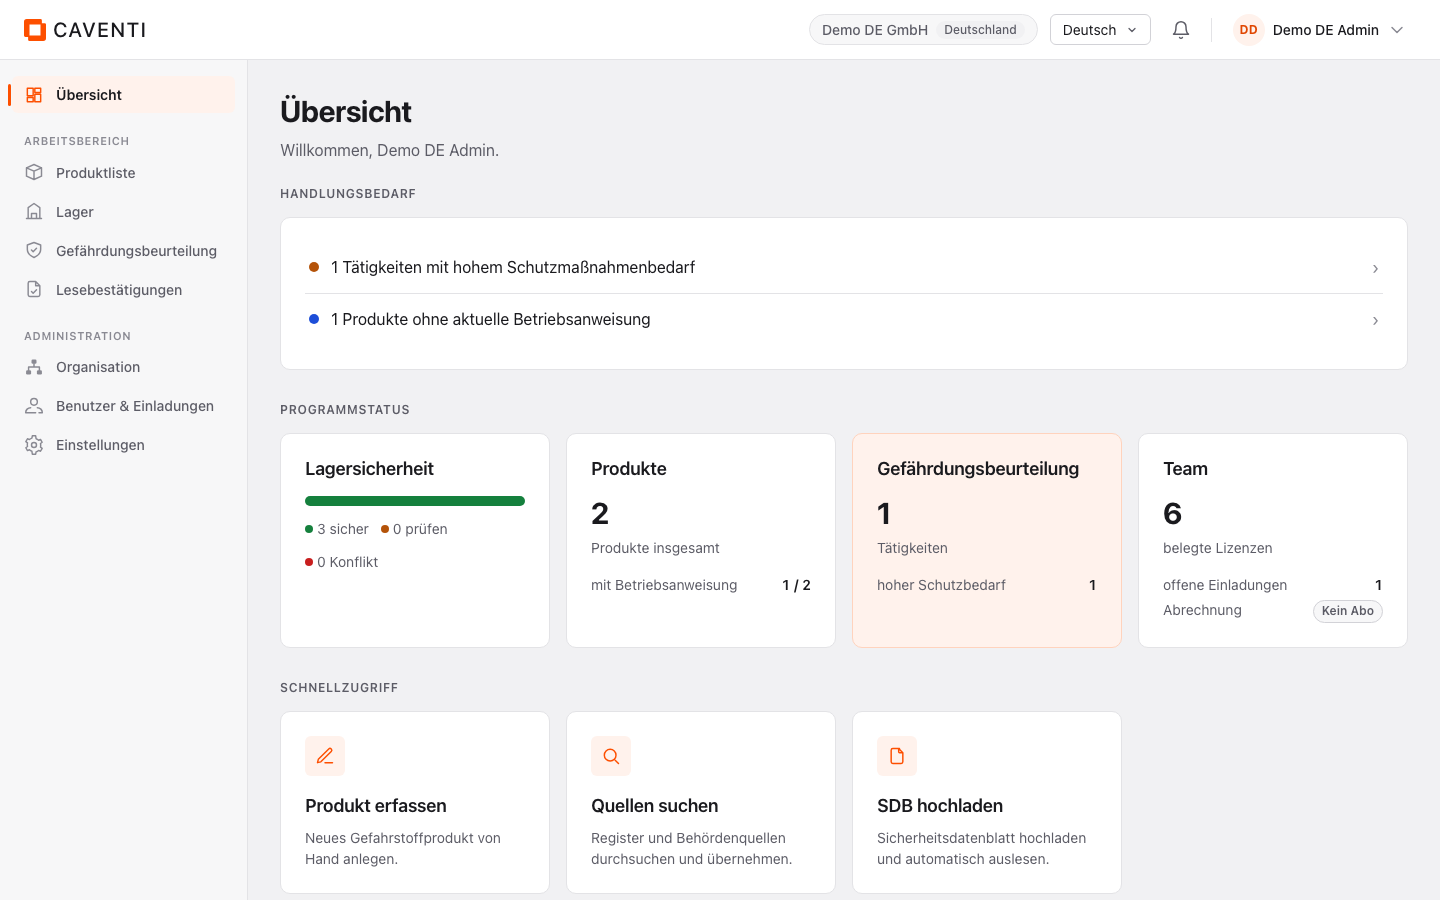
After sign-in you land on the dashboard with a personal greeting. It bundles three areas and a status band and is the starting point for the day.
- 1 Needs attention A queue of open safety-relevant items, each row with a coloured severity dot and a chevron. Observed: "Tätigkeiten mit hohem Schutzmassnahmenbedarf", "Lager getrennt lagern oder prüfen", "Produkte ohne Gefahreneinstufung". Each row deep-links to exactly the surface that resolves it. When nothing is open, "Alles im grünen Bereich" appears.
- 2 Program health Four status cards: storage safety (a traffic-light bar "sicher / prüfen / Konflikt" plus per-Lager alert rows), products (total, "mit Betriebsanweisung", "ohne Gefahreneinstufung"), risk assessment (activities and high protection need) and team (occupied seats, open invitations, billing with a status badge such as "Kein Abo").
- 3 Quick actions Role-dependent tiles. For an administrator: "Produkt erfassen", "Quellen suchen" and "SDB hochladen". The "Scannen" tile appears instead for workers. Along the bottom runs the "Systemstatus" band with the value "Verbunden" and a green dot (database health).
The app shell and the language
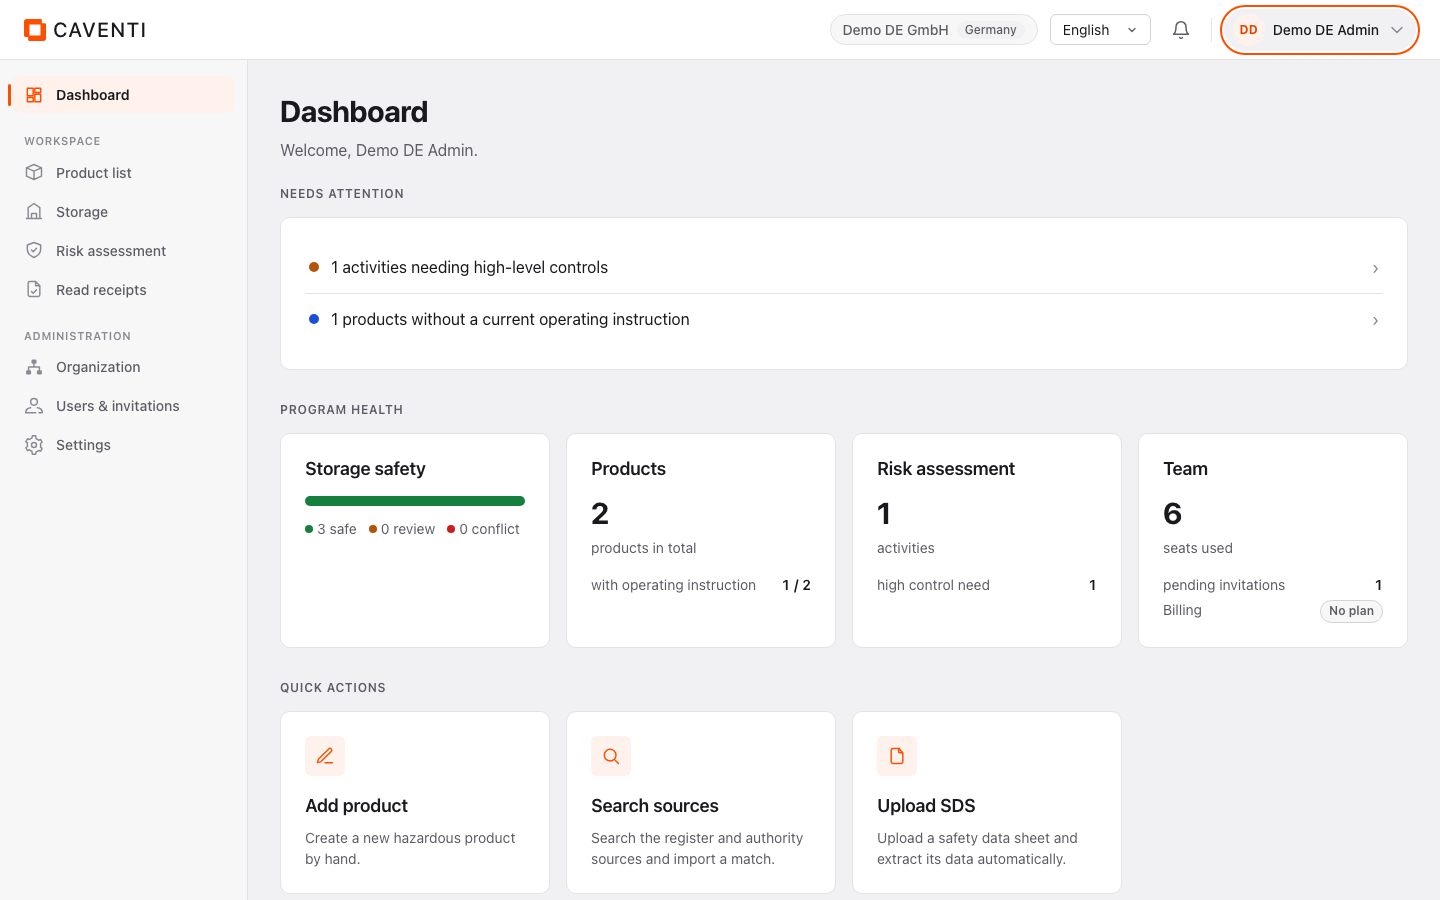
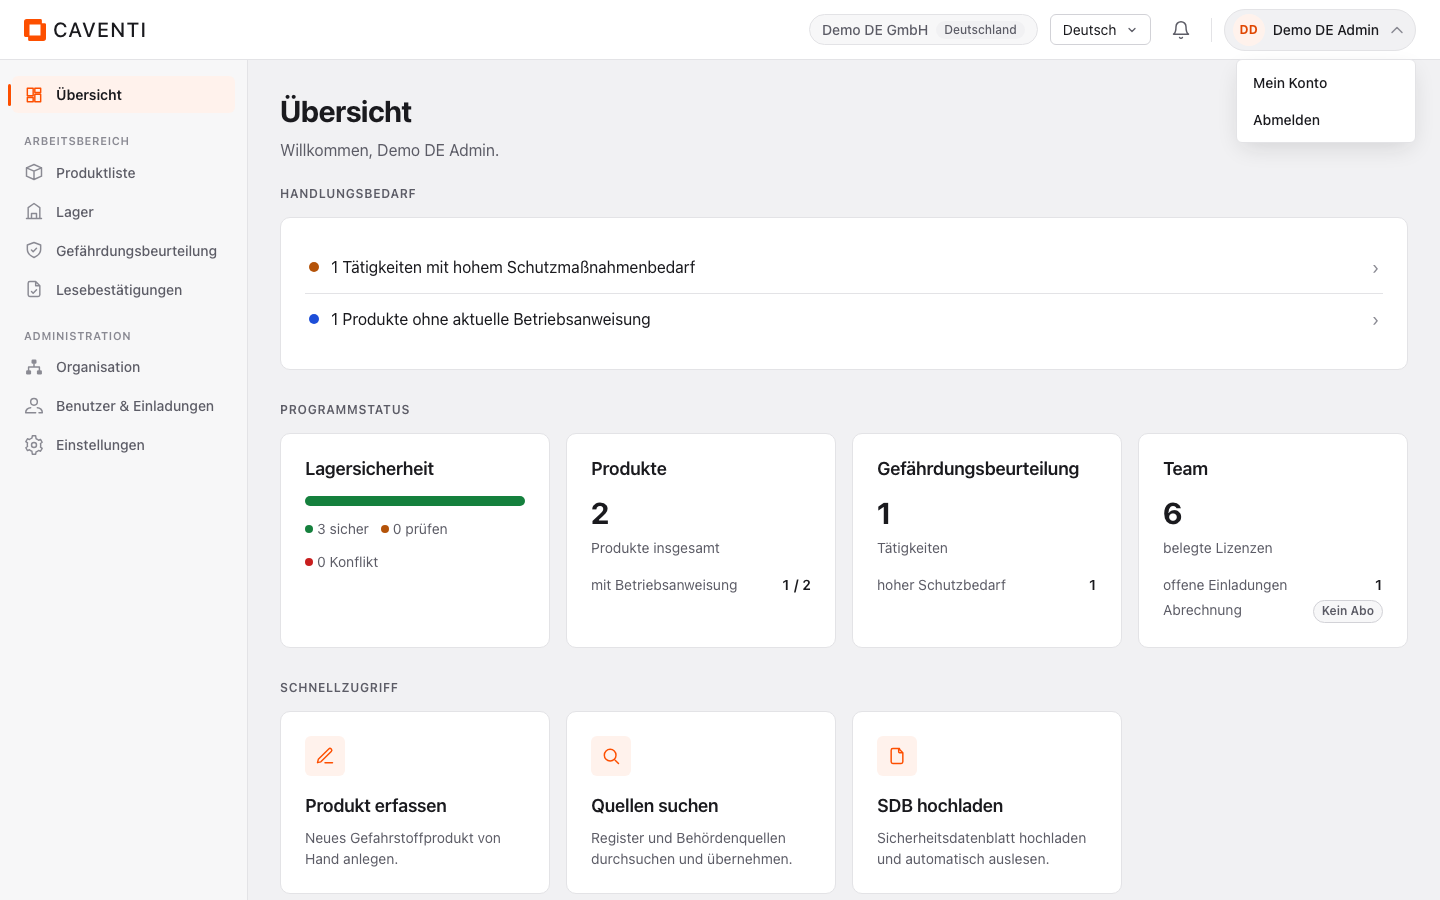
Every signed-in page carries the same shell: on the left the "Hauptnavigation", along the top a bar with the brand and a company chip (for example "Demo DE GmbH"), the language selector, the notification bell and the user menu. Navigation is grouped: "Arbeitsbereich", "Administration" and (where applicable) "Für mich".
The language selector switches the whole interface between German, French, Italian and English; the page reloads briefly and appears fully in the chosen language (the behaviour stays the same, only the labels change). Safety-critical hazard text is never translated, it stays in its official form. The user menu opens "Mein Konto" and "Abmelden".
Roles and what they see
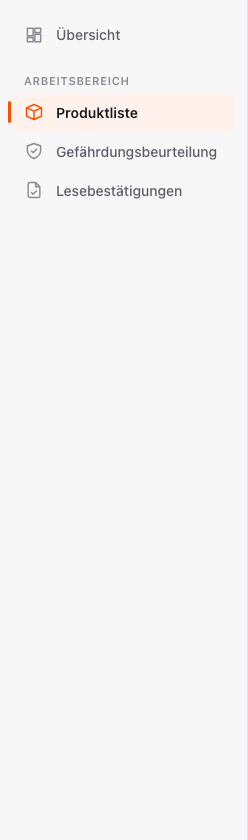
Navigation is role-dependent: each person sees only what their role and position entitle them to. Four roles are assignable (Administrator/in, Sicherheitsbeauftragte/r, Mitarbeiter/in, Auditor/in); on top of that, positions in the organisation (Leitung, Verantwortliche/r) unlock further areas.
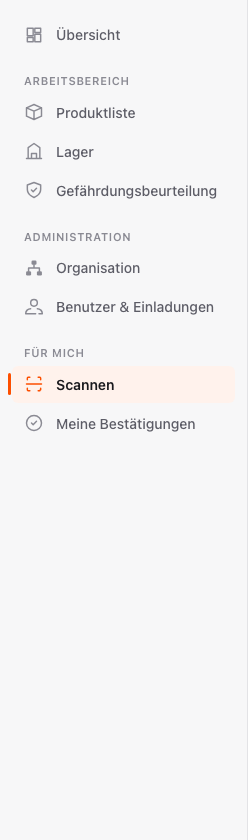
- 1 Administrator/in Sees everything: dashboard; Arbeitsbereich (Produktliste, Lager, Gefährdungsbeurteilung); Administration (Organisation, Benutzer & Einladungen, Einstellungen).
- 2 Sicherheitsbeauftragte/r Dashboard plus Arbeitsbereich with Produktliste and Gefährdungsbeurteilung. No Lager, no Administration.
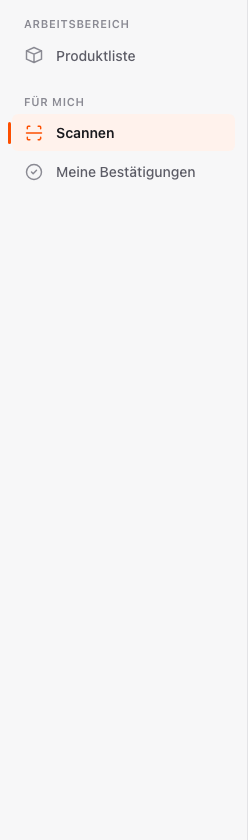
- 3 Mitarbeiter/in Arbeitsbereich with Produktliste and the "Für mich" group (Scannen, Meine Bestätigungen). No dashboard, no Gefährdungsbeurteilung. In the example "Organisation" also appears because this person holds a leadership position; without a position the Administration block is absent.
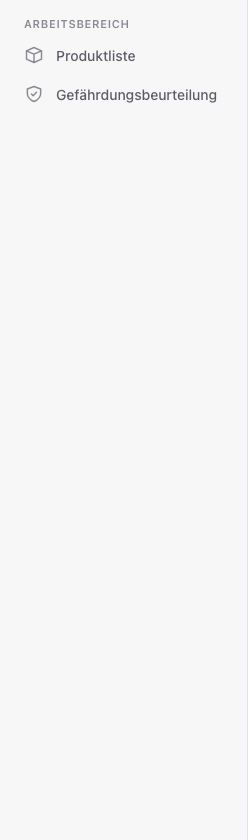
- 4 Auditor/in Only Arbeitsbereich with Produktliste and Gefährdungsbeurteilung, read-only. No dashboard, no Administration, no Einstellungen.
- 5 Division administrator The leader of an autonomous unit: dashboard; full Arbeitsbereich (Produktliste, Lager, Gefährdungsbeurteilung); Administration with Organisation and Benutzer & Einladungen (but without Einstellungen) plus "Für mich".
Building the organisation
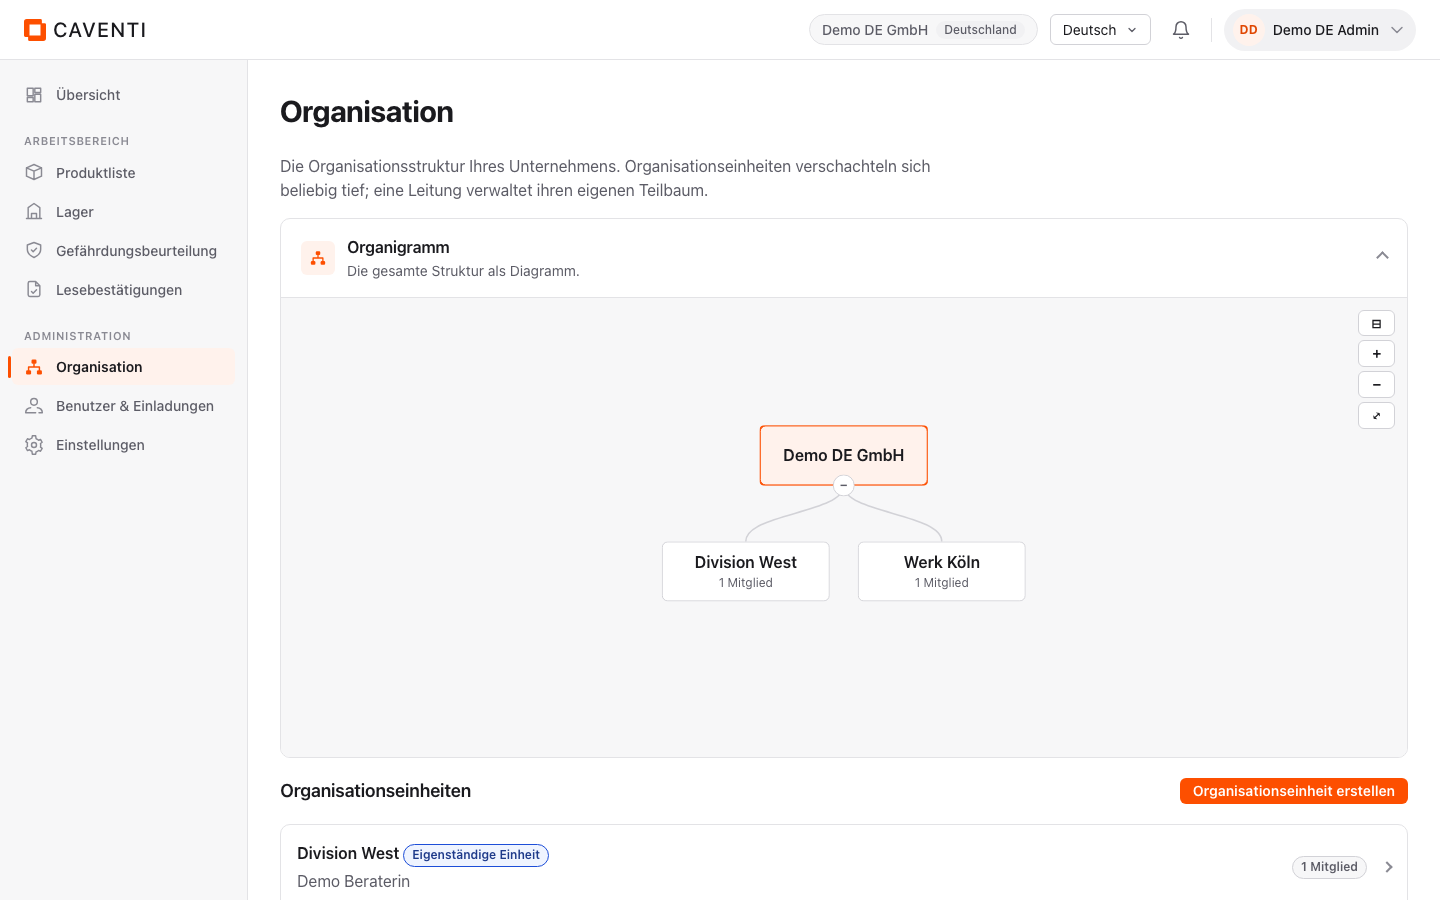
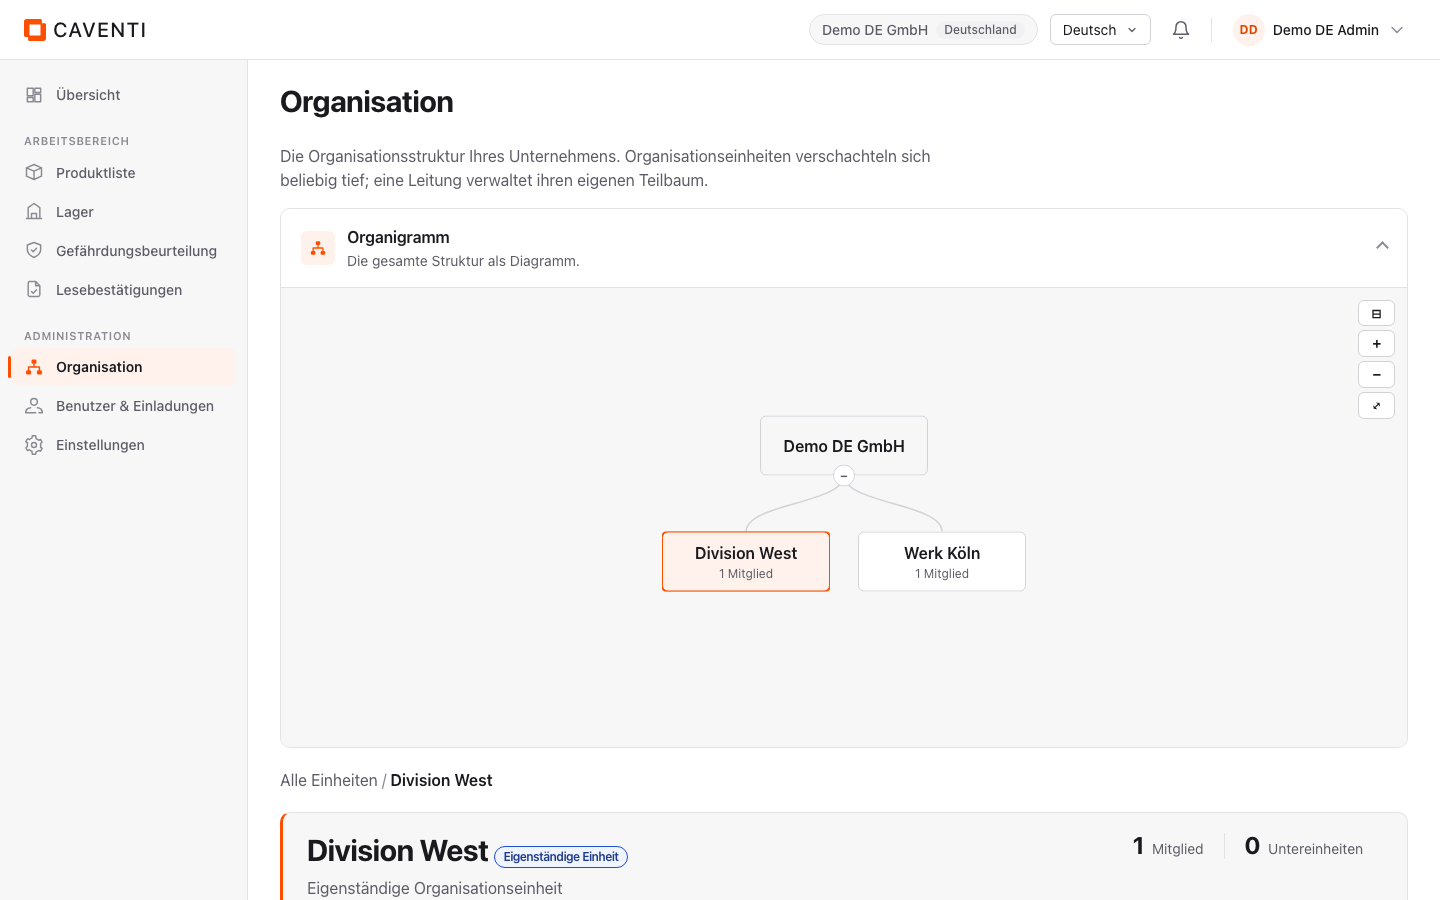
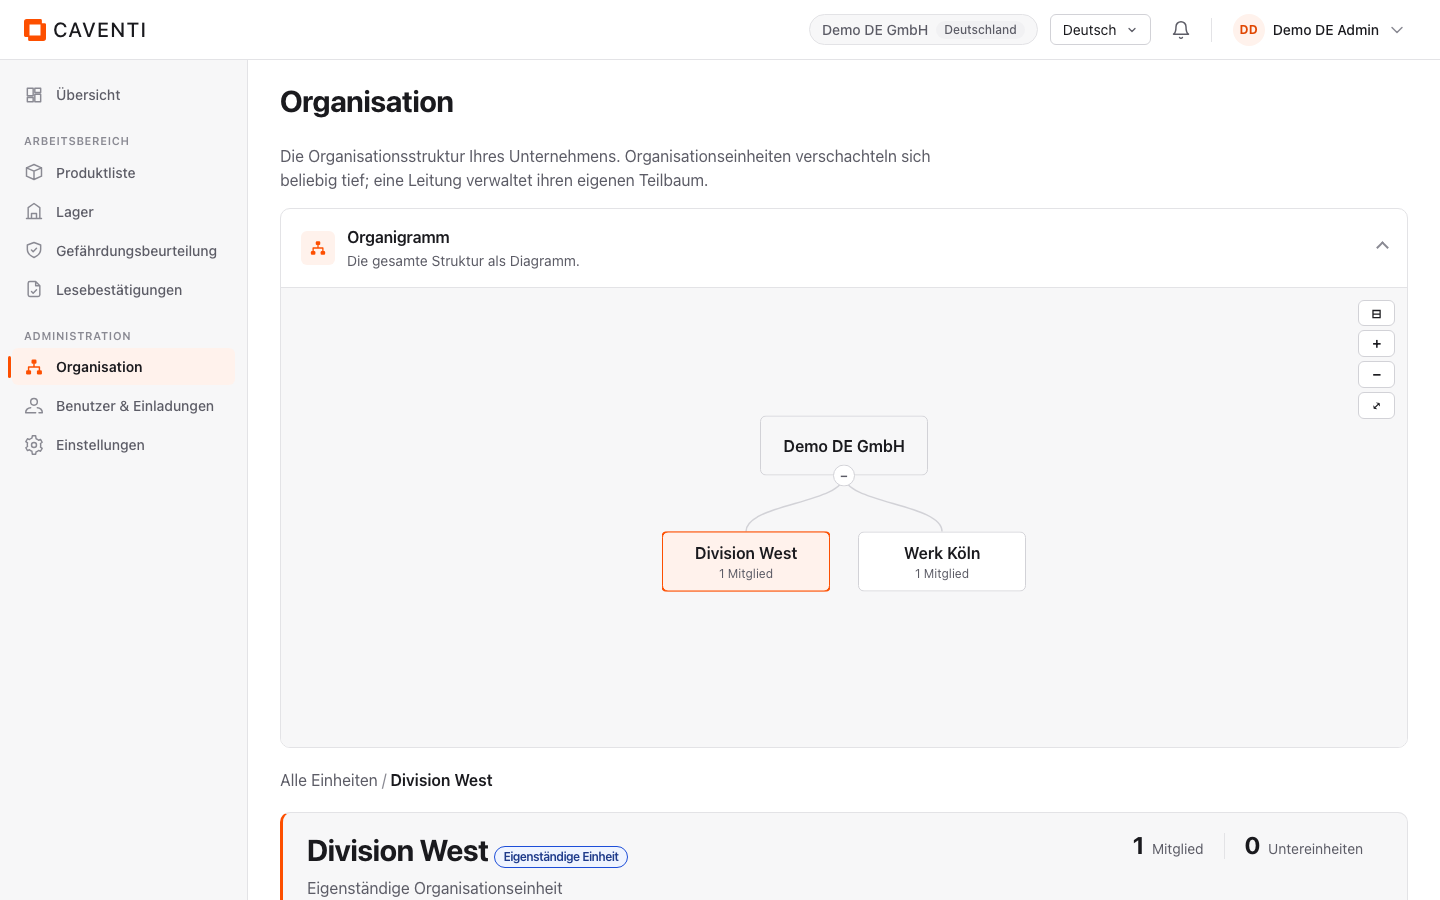
Under "Organisation" you model your structure. An "Organigramm" shows the whole structure as a diagram (the company is the root, the units with their member counts sit below). Via "Einheit hinzufügen" you create a unit; the dialog has the checkbox "Als eigenständige Einheit führen" (checked by default). For a plain group you simply leave it unchecked.
An "eigenständige Einheit" (organisational unit, such as a division or plant) manages its own storage, products, risk assessments and users, and its leader becomes its administrator. Such units carry the "Eigenständige Einheit" badge. When you mark one, a confirmation dialog offers to create a same-named Lager at once.
- 1 Members and leadership In the "Mitglieder" card you add people via "Mitglied hinzufügen" (typing in the search field suggests matching people). The "Leitung" toggle on a member row makes the person the leader of the subtree; changes save automatically ("Gespeichert.").
- 2 Subunits and responsible person Via "Untereinheit erstellen" you nest as deep as you like. The "Verantwortliche/r" block names a responsible person (typeahead, bounded to the subtree); without an assignment it reads "Nicht festgelegt", and a clear button resets it.
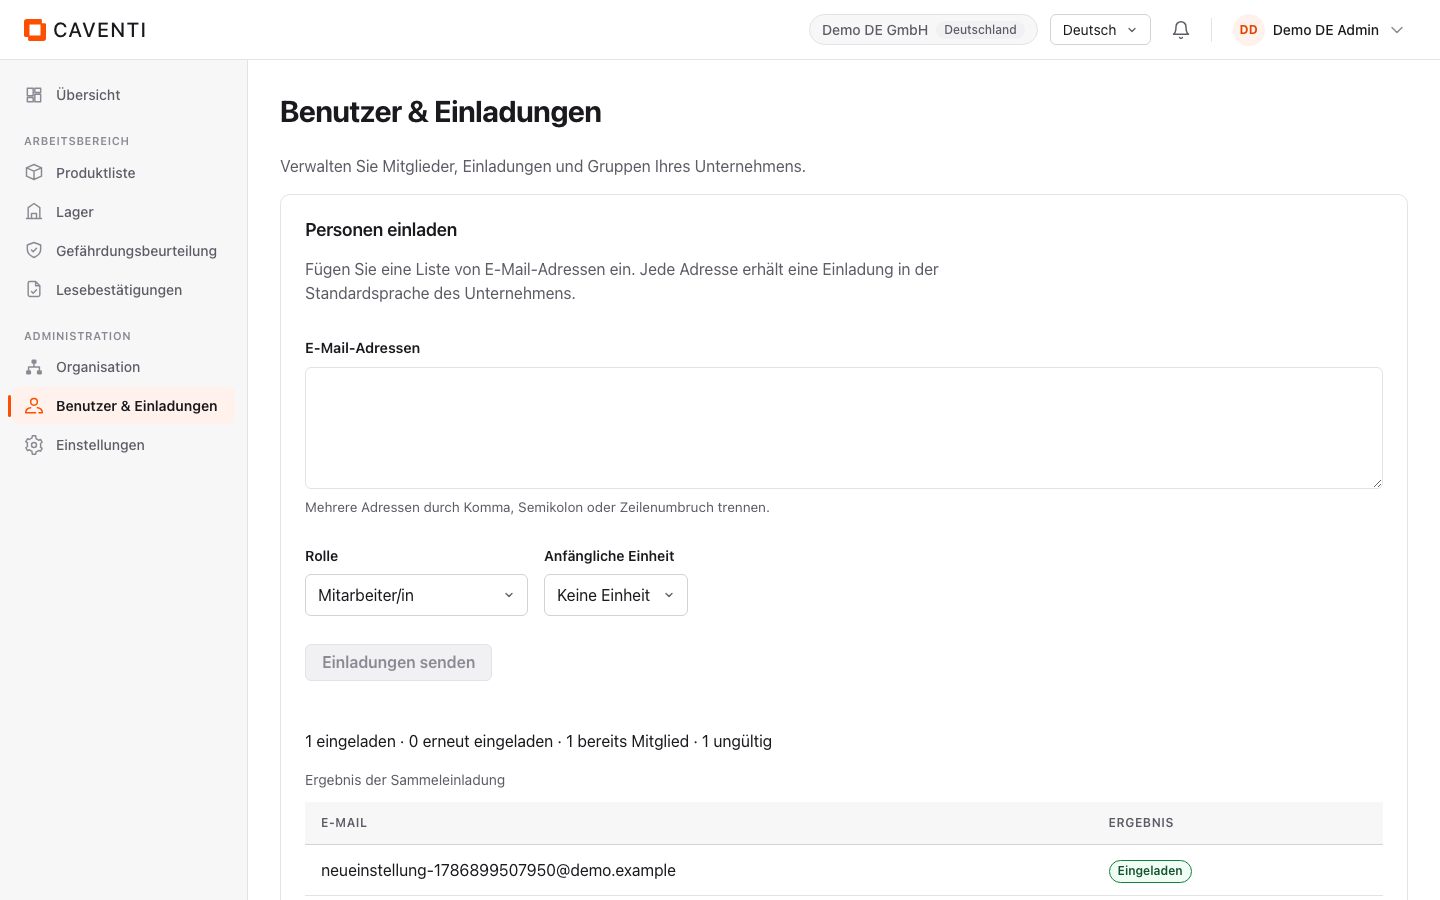
- 3 Invite people (bulk invite) Under "Benutzer & Einladungen" you paste a list into the "E-Mail-Adressen" field (separated by comma, semicolon or line break), optionally set the role and the "Anfängliche Einheit" and click "Einladungen senden". The "Ergebnis der Sammeleinladung" table shows a per-row outcome: "Eingeladen", "Bereits Mitglied" or "Ungültig". New invitations appear under "Ausstehende Einladungen".
Capture the first product
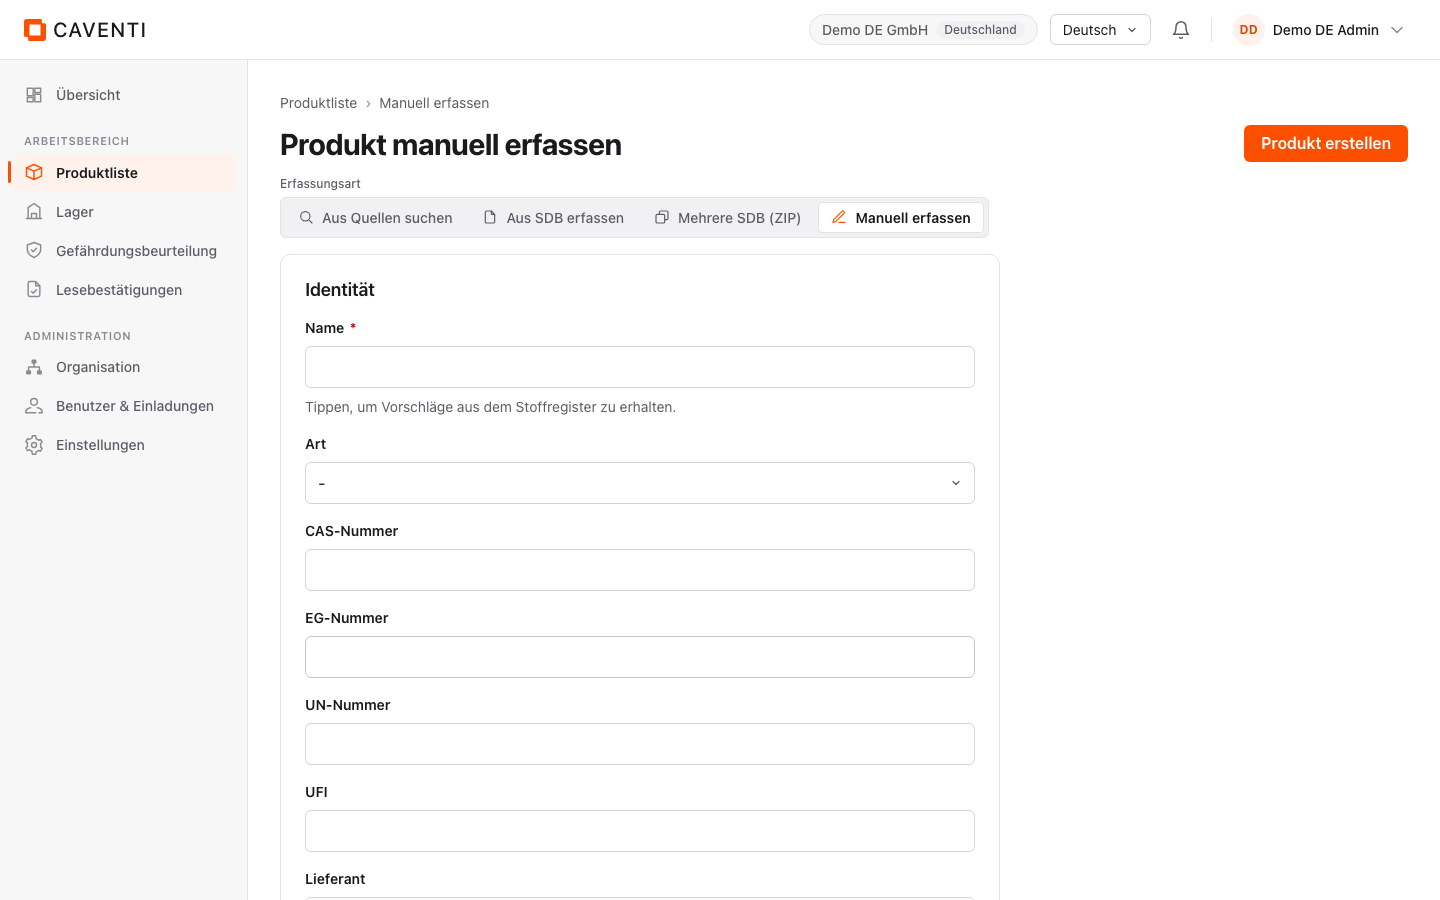
From the dashboard the "Produkt erfassen" tile leads straight into product capture. On "Produkt manuell erfassen" an "Erfassungsart" strip chooses between four paths: "Aus Quellen suchen", "Aus SDB erfassen", "Mehrere SDB (ZIP)" and "Manuell erfassen". The identity card asks for the name (with suggestions from the substance register), type, CAS, EC and UN numbers, UFI and supplier.
The product register is the backbone of the application: storage safety, risk assessment and the operating instruction all build on the same record. Exactly how the four capture paths work and how each field carries its source is shown on the product-capture page.
FAQ
Do I need a password?
No. You sign in with a magic link sent to you by e-mail. If you belong to more than one company, you then choose the company you want.
Why do I see fewer menu items than a colleague?
Navigation depends on role and position. An auditor sees only Produktliste and Gefährdungsbeurteilung, a worker sees "Für mich" with scanning and acknowledgements. "Organisation" appears for workers only when they hold a leadership position; workers and auditors do not see the dashboard.
Is the interface really translated in full?
Yes, every control appears in German, French, Italian and English. The exception is safety-critical hazard text (H and P statements, signal word, GHS classification): it stays unchanged in its official form and is never machine-translated.
Continue in the documentation
Try Caventi for free
Add your first product and see the derived hazards, the joint-storage check and the operating instruction in minutes.